How to Install Curved LED Walls Step by Step

Time:2026-10-03 Author:Henry
0%

Curved LED walls create immersive spaces, but their installation demands more than attaching panels to a shaped frame. Every module, cabinet, cable, and processor must follow the wall’s intended geometry. A small alignment error can become a visible wave across the screen.

“Curved LED walls reward precision long before the first pixel lights up,” says Michael Torres, an LED display systems engineer with field experience in large-format installations. His observation captures the central challenge: installers must coordinate structural planning, cabinet tolerances, signal distribution, power loading, and final calibration. This guide explains how to install curved LED walls through practical, step-by-step decisions.

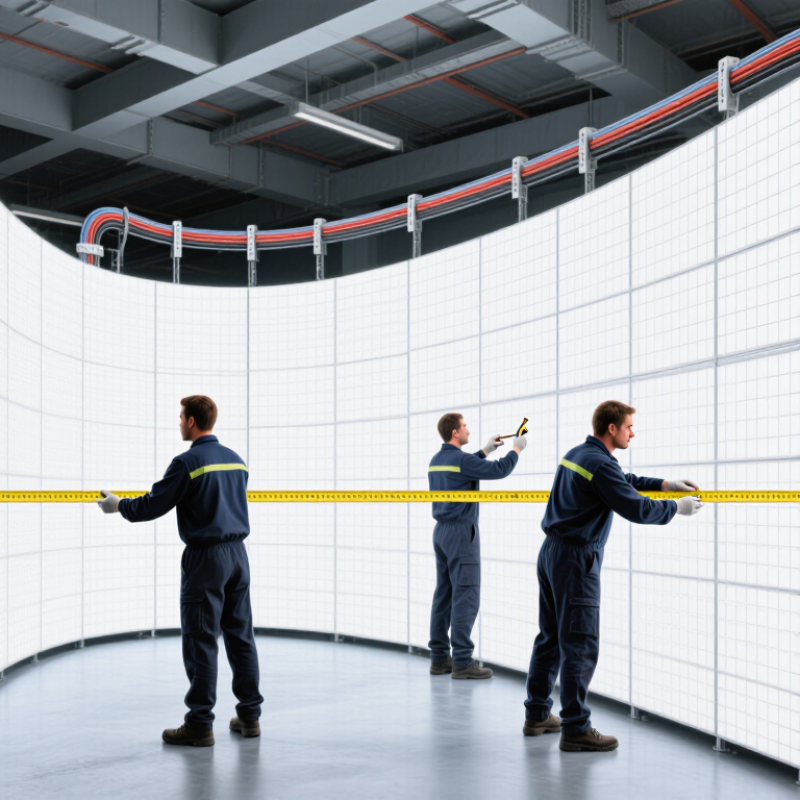
The process begins with a site survey. Measure the radius, viewing distance, floor level, fixing points, and available power. Record obstacles such as sprinkler pipes, ventilation ducts, and access doors. A drawing may look accurate, yet the real wall can reveal unexpected deviations. That is where many plans become imperfect.

Next, confirm whether the cabinets support concave, convex, or adjustable installation. Do not force standard flat cabinets into a curve. Build or inspect the supporting frame, then check its radius at several points. Install cabinets from a stable reference line, using calibrated tools instead of visual judgment. Keep cable paths organized and label every connection.

After powering the system, test one section at a time. Look for brightness differences, dead pixels, flicker, and uneven seams. Adjust the receiving cards and processor settings carefully. The final image should be checked from multiple viewing angles, because a wall can appear perfect straight on and uneven from the side. Safety, documentation, and future access matter just as much as appearance.
How to Install Curved LED Walls Step by Step

Assess the Site and Define the Curved LED Wall Requirements

Before installation, inspect the site in person, not only from drawings. Measure wall width, height, radius, and the curve’s direction. A gentle arc needs different framing from a tight semicircle. Mark columns, doors, sprinklers, and emergency routes. Check floor strength and overhead fixing points with qualified personnel. Record viewing distances from seats, walkways, and cameras. These measurements define the usable image area and pixel pitch. Bright windows may require higher brightness, while dark rooms need better control.

Define the wall’s operating conditions before choosing components. Confirm indoor or outdoor exposure, humidity, temperature, dust, and ventilation. Ask how often technicians can reach the rear or front. Service access matters. Choose modular dimensions that follow the radius without forcing panels into stress. Calculate total weight, electrical load, signal paths, and backup capacity. Use certified drawings and local safety requirements. Keep power and data routes separated where practical. Check processor placement and cable lengths on site. A neat plan can fail if a door opens into the frame.

One mistake deserves admitting: early surveys often underestimate reflections and audience movement. Walk the venue at event height and watch the surface from several angles. Use a temporary radius sample when the curve is uncertain. I also photograph every obstruction and label each measurement immediately. Small records prevent expensive changes later. Leave tolerance for building movement, frame adjustment, and uneven floors. Do not hide uncertainty; flag it in the installation plan. Recheck dimensions after the support structure is built, before mounting LED modules.

Select Compatible LED Panels, Mounting Hardware, and Control Equipment

A curved LED wall begins with compatible panels, not the mounting frame. Check each panel’s cabinet size, pixel pitch, weight, and approved bending radius. A tighter curve can damage modules or create visible brightness differences. Measure the venue’s arc with a flexible template, then compare it with the panel manufacturer’s technical data.

Choose mounting hardware that follows the same radius without forcing the cabinets into position. Adjustable brackets, locking pins, and level supports help maintain a clean surface. The structure must carry the total load, including cables and service access. Leave a small working gap behind the wall. This space makes module replacement less frustrating. Confirm the mounting surface can handle the calculated load before drilling.

Control equipment must match the panel resolution, scan method, refresh rate, and signal inputs. Use receiving cards designed for the selected cabinets, then pair them with a processor that supports the wall’s total pixel count. Keep power and data paths separate where practical. Label every cable at both ends. Test one panel, one curve section, and one complete signal chain before full assembly. My first mock-up looked accurate, but the outer panels showed a slight angle mismatch. I had trusted the drawing too much. Recheck alignment with a laser level and inspect the wall from the audience distance. Small errors become obvious when bright content fills the screen.

Prepare the Structure, Power Supply, and Signal Connections

How to Install Curved LED Walls Step by Step

A curved LED wall needs a rigid structure before any panel is attached. Measure the required radius, floor level, and suspension points. Small errors become visible across the curve. Use adjustable supports, locking pins, and a calibrated laser level. Leave service access behind the wall. According to the AVIXA 2024 IOTA report, global professional AV revenue exceeded 300 billion dollars in 2024, increasing demand for safer, more repeatable installations. Yet market growth does not replace careful site engineering.

Plan power distribution from the estimated maximum load, not the average display brightness. Record each cabinet’s rated wattage, multiply it by the cabinet count, and add practical headroom. A 20-cabinet wall rated at 500 watts per cabinet requires 10 kilowatts before engineering allowances. Separate high-voltage runs from signal cables. Use approved protection, grounding, and load balancing under local electrical rules. IEC 62368-1 provides a useful safety framework for professional audio, video, and information technology equipment. It is not a substitute for a licensed electrician.

Signal wiring should follow a simple path: processor, distribution, receiving cards, then cabinets. Label both ends of every cable. Keep connectors clean and locked. Test each section before closing the rear access. Verify resolution, refresh rate, grayscale, and cabinet mapping. Standard copper Ethernet channels are commonly limited to 100 meters, including patch cables, so long routes may require optical transmission. I have seen tidy installations fail because one spare cable was never tested. Build redundancy where the event cannot pause. Leave a written test record, even if the first image looks perfect.

Assemble and Align the Curved LED Wall Panels Step by Step

How to Install Curved LED Walls Step by Step

Assemble the curved LED wall on a clean, level floor. Check every cabinet for bent corners, damaged connectors, or loose receiving cards. Label each panel before lifting it. MarketsandMarkets estimated the LED display market at about USD 7.5 billion in 2023 , showing how widely these systems are being deployed. More installations also mean more pressure for accurate assembly.

Build the base frame first.

Set the center cabinet, then connect panels outward in both directions. Follow the approved curve radius, rather than forcing the cabinets into position. Tighten each lock evenly. Leave no visible gap. A thin feeler gauge helps detect uneven joints. I usually check the first three cabinets twice. Small errors multiply across the wall.

Power the wall only after checking signal paths and grounding. Run a low-brightness test pattern, then inspect vertical lines, cabinet gaps, and brightness differences. AVIXA’s 2024 Industry Outlook projected professional audiovisual revenue to rise from roughly USD 306 billion in 2023 to USD 393 billion by 2028. Reliable installation supports that growing demand. Still, software alignment cannot correct a twisted frame. That part is easy to forget. Adjust the physical curve before calibration, and photograph each corrected section for maintenance records.

Configure, Test, and Fine-Tune the Completed LED Display

After installing a curved LED wall, configuration should begin with the physical shape. Measure each cabinet’s position, angle, and gap before sending video signals. Enter the wall’s exact pixel layout into the control system. A small mapping error can shift a face or logo across two cabinets.

Keep brightness moderate during setup. Excessive brightness may hide uneven color and create unnecessary heat. Set the refresh rate, input resolution, and frame rate to match the source device. Check every data and power connection by hand. Loose connectors often appear stable until the wall warms up.

Testing needs more than a colorful video. Display white, black, red, green, and blue test fields. Walk across the viewing area and inspect brightness changes along the curve. Look for dark pixels, flicker, scan lines, and visible cabinet seams. I once missed a dim corner because I tested from the center only. That was a poor assumption.

Fine-tune grayscale, color temperature, and brightness in small steps. Use a calibrated light meter when available, but trust careful visual checks too. Curved surfaces can make one side appear brighter than the other. Adjust viewing angles and content safe areas after calibration. Test fast motion, subtitles, and thin lines. Thin lines can reveal mapping problems quickly. Record every adjustment, including the imperfect ones. A second review after several hours of operation often exposes thermal drift or a connector that needs reseating.

How to Install Curved LED Walls Step by Step

Configure, test, and fine-tune the completed LED display by comparing key acceptance metrics before and after calibration. Higher values indicate better uniformity, alignment, and consistency.

Fine-tuning typically improves brightness uniformity, grayscale consistency, cabinet seam alignment, and color consistency across the curved LED surface.

FAQS

What should be measured before installing a curved LED wall?

Measure the wall width, height, radius, and curve direction on site. Record columns, doors, sprinklers, and emergency routes. Viewing distance affects the usable image area and pixel pitch.

Why does the curve radius matter?

A gentle arc needs different framing from a tight semicircle. Panels should follow the approved radius without force. Do not guess.

Which site conditions must be checked?

Confirm indoor or outdoor exposure, humidity, temperature, dust, and ventilation. Bright windows may require higher brightness. Dark rooms need tighter brightness control.

How should structural and electrical requirements be reviewed?

Check floor strength and overhead fixing points with qualified personnel. Calculate total weight, electrical load, signal paths, and backup capacity. Separate power and data routes where practical.

Why is service access important?

Confirm whether technicians can reach the front or rear. Cable lengths and processor placement should be checked on site. A neat plan can fail if a door hits the frame.

How should the curved panels be assembled?

Work on a clean, level floor. Inspect corners, connectors, and receiving cards before lifting panels. Set the center cabinet first, then connect panels outward.

How can installers prevent visible gaps and alignment errors?

Tighten each lock evenly and check joints with a thin feeler gauge. Recheck the first three cabinets twice. Small errors multiply.

When should testing and calibration begin?

Power on only after checking signal paths and grounding. Use a low-brightness test pattern to inspect lines, gaps, and brightness differences. Software cannot fix a twisted frame.

What mistakes deserve special attention during installation?

Reflections and audience movement are often underestimated. Walk the venue at event height and inspect several viewing angles. Use a temporary radius sample when the curve remains uncertain.

What records should be kept during the project?

Photograph obstructions and label every measurement immediately. Record corrected frame sections for future maintenance. Recheck dimensions after building the support structure, before mounting modules.

Conclusion

Learning how to install curved LED walls begins with a careful site assessment. Determine the wall’s dimensions, curvature, viewing distance, installation environment, structural capacity, and display goals before selecting suitable LED panels, mounting hardware, power components, processors, and control equipment. Accurate planning helps ensure that every part is compatible and that the finished display can operate safely and reliably.

Next, prepare the supporting structure, power supply, ventilation, and signal pathways. Assemble the LED panels gradually along the planned curve, securing each section firmly while checking the alignment, gaps, angle, and overall surface smoothness. After the physical installation is complete, connect the control system and configure the display settings. Test brightness, color consistency, image quality, signal stability, and content playback across the entire wall. Fine-tune individual panels and correct any visible alignment or performance issues to achieve a seamless, professional curved LED display.

Henry

Henry

Henry is a dedicated marketing professional with a profound expertise in the company's offerings. With years of experience in the industry, he possesses an impressive understanding of the market dynamics and consumer behaviors that drive success. Henry is committed to sharing his insights through......