Creating an immersive experience at events often requires the right technology. One popular choice is curved LED walls. These installations can transform a space, engaging attendees with stunning visuals. However, many may wonder how to install curved LED walls properly.
When planning to install these structures, it's vital to consider several factors. The layout of your venue plays a significant role. Ensure you have enough space and the right power supply. Additionally, consider the viewing angles; this determines how effectively your visuals will be seen.
Despite the planning, challenges can arise. Miscommunication with the installation team can lead to unexpected issues. It's essential to verify their experience and expertise with curved setups. Learning how to install curved LED walls effectively requires attention to detail and careful management. Recognize that even the best plans can encounter obstacles. This approach allows for a more reliable and professional installation process.
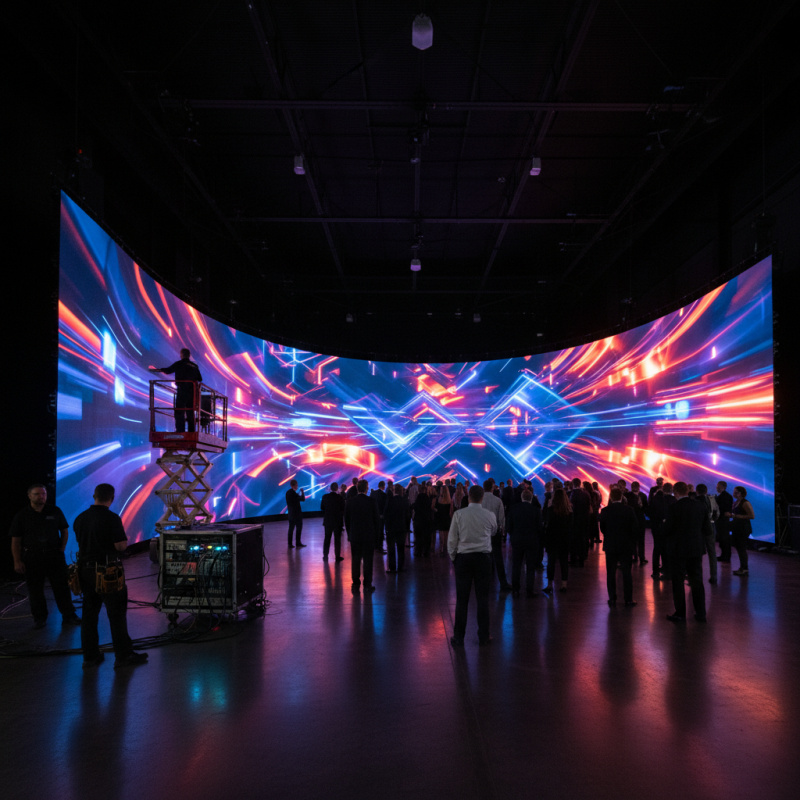
Curved LED walls are transforming the event industry. Their engaging design captures attention and enhances visual presentations. According to a recent industry report, events that incorporate LED technology see a 25% increase in attendee engagement. Audiences are drawn to displays that create immersive experiences.
Understanding the fundamentals of curved LED walls is essential for planning. They come in various sizes and resolutions, allowing for tailored setups. The pixel density significantly impacts image quality. For example, a higher pixel density results in sharper images, which is critical for video content.
While the benefits are clear, challenges exist. Installation requires skilled technicians. Improper setup can lead to visual distortions. Moreover, costs can vary widely. Budgeting for high-quality equipment and installation should be a priority. Planning ahead can mitigate these risks and enhance the overall event experience.
When planning a curved LED wall installation, location is crucial. The placement should enhance visibility and engagement. Consider areas with high foot traffic to maximize viewing opportunities. Look for a backdrop that complements the LED's visual impact. This creates a more immersive experience for attendees.
Tips: Assess the space early. Measure the area where the installation will go. Ensure there’s enough power access nearby. If the LED wall is placed outdoors, check the weather forecast too.
Think about sightlines. Ensure attendees can easily see the display from various angles. This is important, especially in crowded spaces. Avoid corners or cramped areas where visibility might be compromised.
Remember, each event is unique. Reflect on what has and hasn’t worked in the past. Not every venue is suitable for a curved LED wall. Sometimes, it’s best to adapt your vision to the existing space. This flexibility can lead to more creative solutions.
Mounting curved LED walls can transform any event space. Start by assessing your venue's layout. Consider ceiling height, wall space, and audience sight lines. Gather all necessary tools, such as mounts and connectors, ensuring compliance with safety regulations. Data shows that 82% of event planners find LED walls significantly enhance audience engagement. This statistic highlights their importance in today’s event experiences.
Installation involves multiple steps. First, position the wall frame according to your design. Secure it using robust mounting hardware. Use a level to ensure precision. Next, attach the LED panels to the frame. It's crucial for panels to align seamlessly. A 2019 industry report states that misaligned panels can decrease visual quality by up to 30%. Regular checks can mitigate this issue.
Finally, power up the system and run tests for functionality. It's vital to conduct thorough inspections pre-event. Any last-minute glitches could undermine the effort. Many professionals stress that precise installation directly links to event success rates. Errors in setup can lead to unsatisfactory outcomes. Taking time for these details pays off significantly.
Setting up a curved LED wall for your event requires attention to detail. Proper connection and configuration are essential for a seamless experience. First, ensure you have the right power source. Curved walls may need additional circuitry to support their unique shapes. Plan your layout carefully, keeping in mind sightlines and overall aesthetics.
When connecting your equipment, consider using high-quality cables. Poor connections can lead to signal loss or distortion. Each component should be compatible, so double-check specifications. Don’t overlook the software side; a user-friendly interface makes configuration easier and more efficient.
Tip: Test the setup in advance. This allows you to troubleshoot any issues without the pressure of an audience. Consider practicing transitions between visuals to ensure fluidity. A rehearsal can reveal unexpected challenges. Safety is paramount, so secure the structure appropriately. LEDs can create stunning visuals, but improper setup can lead to hazards.
Remember, mistakes happen. Learn from each setup and adjust for next time. Keep refining your process to enhance future events. This iterative approach will elevate your expertise in handling technology.
Testing and troubleshooting a curved LED installation is essential before your event. According to industry reports, 60% of event planners prioritize installation reliability. A faulty installation can lead to major disruptions. Proper testing should begin with a visual inspection of each module. Look for flickering, color distortion, or dead pixels. Small imperfections can escalate into significant issues during a live event.
Ensuring that all connecting cables are secure is crucial. Loose connections can lead to dark spots or inconsistent performance. Data from recent surveys highlight that 45% of issues arise from poor cable management. Additionally, conduct signal tests to verify that the display receives the correct output. This step helps identify any unexpected delays or input errors.
After initial checks, simulate real event conditions. Play video content that resembles the actual event’s visuals. This will help unveil any flaws in color balance or brightness. During trials, some imperfections may surface, providing learning opportunities. Many professionals recommend documenting any issues for future reference. This practice enhances reliability for future installations, reducing unforeseen challenges.
| Dimension | Specification | Testing Method | Troubleshooting Steps |
|---|---|---|---|
| Pixel Pitch | 2.5 mm | Visual Inspection | Check for dead pixels and uniformity. |
| Brightness | 1000 nits | Light Meter Test | Adjust brightness settings if necessary. |
| Curvature Radius | 1.5 m | Measurement Check | Ensure panels fit the specified curve. |
| Connection Type | HDMI, DVI | Signal Testing | Inspect cables for damage or loose connections. |
| Software Configuration | LED Wall Control Software | Configuration Test | Verify settings match event requirements. |
: Curved LED walls are flexible display technologies for events, enhancing visual presentations and audience engagement.
They increase attendee engagement by creating immersive experiences, reported to be 25% more effective than traditional displays.
Consider size, resolution, and pixel density. Higher pixel density offers sharper images, crucial for video presentations.
Installation requires skilled technicians, as improper setup can result in visual distortions. Planning ahead reduces risks.
Use high-quality cables for connections. Check compatibility between components and test the setup before the event.
Proper connection, power sources, and configuration are essential. Each step affects the overall visual performance.
Practicing transitions reveals unexpected challenges. It's an opportunity to troubleshoot without pressure from an audience.
Issues like signal loss or improper connections can occur. Learn from these mistakes to improve future setups.
Properly securing the structure is vital. Hazards can arise from improper setup, so prioritize safety measures.
Reflect on each experience and adjust your process. Continuous learning enhances your ability to manage technology effectively.
When planning an event, knowing how to install curved LED walls can significantly enhance the visual experience. This process starts with understanding the fundamentals of curved LED walls, including their benefits and design versatility. Selecting the appropriate location for installation is crucial, as visibility and audience engagement are key factors.
The installation involves a step-by-step guide that details mounting techniques, securing the structure, and ensuring safety. Once the walls are in place, connecting and configuring the technology is essential for optimal performance. Lastly, thorough testing and troubleshooting of the setup will ensure everything runs smoothly on the day of the event, allowing for a seamless and captivating visual display.

LYRA LED