7 Best Ways to Troubleshoot LED Video Walls?

Time:2026-10-13 Author:Henry
0%

LED video walls can look impressive, yet small faults often reveal larger system problems. A single dark module may indicate a loose data cable, unstable power, or a failing receiving card. Uneven brightness can come from incorrect calibration, aging LEDs, or unsuitable cabinet settings. These issues rarely appear in isolation.

Learning how to troubleshoot LED video walls requires careful observation and controlled testing. Experienced technicians check the signal path, power distribution, cabinet connections, ventilation, and processor configuration. They also compare current symptoms with maintenance records and manufacturer specifications. A handheld meter, spare module, and signal tester can save valuable time. Sometimes, the obvious cause is not the real cause.

This guide presents seven practical ways to identify and correct common LED wall failures. It covers flickering screens, black cabinets, color differences, image distortion, overheating, and intermittent signals. Each method emphasizes safe isolation, accurate measurements, and documented changes. Never replace several components at once without testing them. That habit can hide the original fault.

Real installations are less predictable than manuals suggest. Dust, humidity, vibration, and rushed setup work can change the diagnosis. Even experienced teams may overlook a damaged connector after focusing on software settings. That deserves reflection. Reliable troubleshooting combines technical knowledge with patience, evidence, and manufacturer support. The goal is not merely to restore an image, but to build a stable display that performs consistently during events, broadcasts, and daily operation.
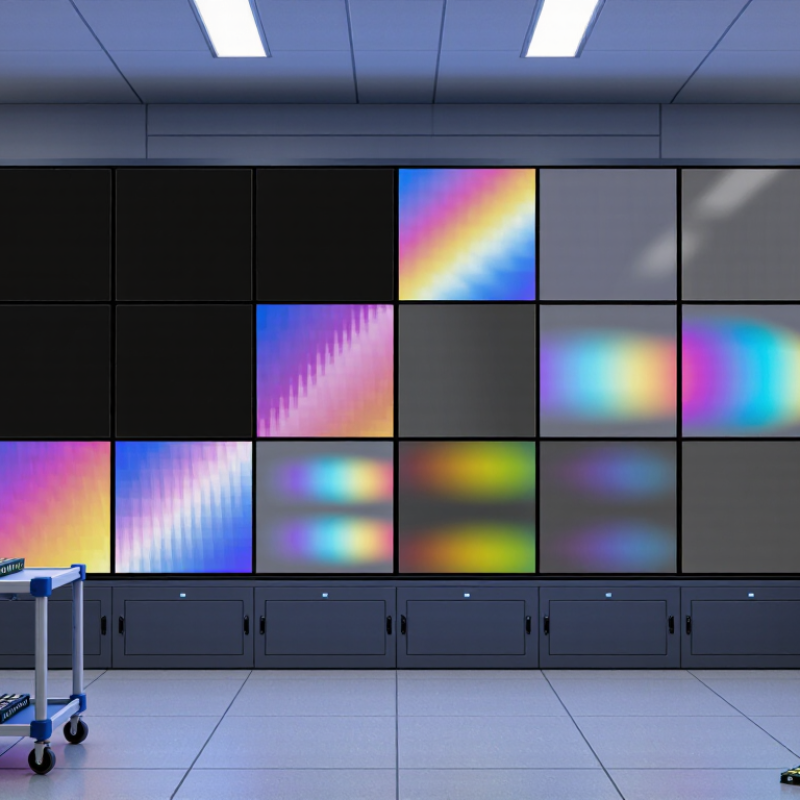
7 Best Ways to Troubleshoot LED Video Walls?

Identify the LED Video Wall Problem and Check Its Visible Symptoms

A reliable LED video wall diagnosis begins with visible symptoms. Stand several meters away, then inspect the surface closely. Look for black modules, dim sections, flickering pixels, color shifts, or irregular brightness. Note whether the problem affects one cabinet, one row, or the entire wall. The pattern often reveals the cause.

A completely dark cabinet may indicate lost power, a loose connection, or a failed receiving component. A single dark pixel suggests a module-level fault. Horizontal lines can point to signal or scanning problems.

Random flickering may come from unstable power, damaged data cables, or excessive heat. Check the cabinet temperature and listen for unusual fan noise. Heat leaves clues.

Do not replace parts too quickly. I have seen technicians blame the control system when a poorly seated cable caused the fault. That mistake wastes time. Photograph the problem before touching anything, and record when it appears. Does it worsen after several hours? Does it change with brightness? These details support a more accurate diagnosis. Inspect connectors only after isolating power and following the site’s safety procedure. If symptoms spread across multiple cabinets, qualified service personnel should test the power distribution and signal path with proper instruments. Flashing patterns can mislead you. Recheck the wall from different viewing distances and angles.

Verify Power Delivery, Cables, Controllers, and Signal Connections

When an LED video wall shows black tiles, flickering, or uneven brightness, inspect power delivery before changing software settings. Confirm every cabinet receives the correct voltage and sufficient current capacity. Loose terminals can create intermittent faults that disappear during testing. Measure voltage at the wall, not only at the distribution panel. Voltage drop often increases across long cable runs. Check breakers, connectors, and grounding practices according to local electrical requirements. If a power supply feels unusually hot, stop and investigate. Guessing wastes time and may damage modules.

Tips: Photograph each connection before moving it. Label power and signal cables at both ends. Swap one cable at a time. Keep a tested spare data cable nearby. Inspect pins for bending, dust, or moisture. I once blamed a controller when a partially inserted connector caused the fault. That mistake reinforced a simple lesson: verify the physical path first.

Test the signal chain from the source to the controller, then to each receiving card. Confirm input resolution, refresh settings, and output mapping match the wall configuration. Incorrect mapping may create reversed sections or missing rows. Use short, tested cables during isolation. Avoid replacing several components together. The original cause may become invisible. Record symptoms, measurements, and changes in a service log. If the fault appears only after warming up, repeat tests at operating temperature. Human inspection helps, but it is not infallible.

Test Content Sources, Resolution, Refresh Rate, and Input Settings

When an LED video wall shows flicker, blank areas, or stretched images, start with the content source. Play a known-good test file from another player. This separates a source problem from a display problem. Check the signal cable for loose connectors, bent pins, or unusual damage. A simple cable swap often reveals more than repeated menu changes.

Match the source resolution with the wall processor’s configured resolution. Incorrect scaling can create cropped edges, soft text, or black borders. Confirm the selected input matches the connected source, not merely the cable position. Then test the refresh rate. A mismatch may cause flashing, rolling lines, or intermittent loss of signal. Use a stable setting supported by both devices. Lower is not always safer.

Use color bars, a grid, and a full-white image to inspect the wall. Look for dead pixels, uneven brightness, or seams between cabinets. If motion appears jerky, compare a second frame rate and observe the same video. Record every change, including the original setting. I once changed three values together and lost the clue. That was careless. Make one adjustment at a time. Check input format, bit depth, and synchronization settings before replacing hardware. Allow the wall to run for several minutes, because heat can expose faults that disappear during a quick test. Short tests mislead.

7 Best Ways to Troubleshoot LED Video Walls: Test Content Sources, Resolution, Refresh Rate, and Input Settings

No. Troubleshooting Method Common Symptom What to Test Expected Result Corrective Action Useful Technical Reference Priority
1 Test the Content Source Black screen, frozen image, missing video, or intermittent playback. Connect the source device to a known-working monitor. Check whether the media player, computer, or camera produces a stable signal. The source displays a continuous image without freezes, dropouts, or error messages. Restart the source device, verify the application output, replace a faulty source cable, and test with a known-good source before changing LED settings. Confirm that the source output is enabled and that the selected output port is active. High
2 Verify Resolution and Aspect Ratio Stretched images, cropped content, unused borders, or a “no signal” message. Compare the source output resolution and aspect ratio with the video wall canvas configured in the controller or processor. The image fills the intended canvas with correct proportions and no unexpected cropping. Set a supported output resolution, preserve the original aspect ratio, and match the processor canvas to the actual wall pixel dimensions. Common video formats include 1920 × 1080 and 3840 × 2160; the supported wall canvas depends on the system configuration. High
3 Check Refresh Rate and Frame Rate Flicker, judder, horizontal bands, tearing, or motion that appears uneven. Check the source frame rate, display refresh rate, processor settings, and synchronization mode. Motion is smooth, and the source and display system operate without visible tearing or repeated frames. Use a compatible combination of frame rate and refresh rate. Enable synchronization where supported and avoid unnecessary frame-rate conversion. Typical video frame rates include 24, 25, 30, 50, and 60 frames per second. The LED wall refresh rate is a separate specification. High
4 Confirm Input Selection and Signal Format The correct device is connected, but the wall shows the wrong input or no signal. Inspect the selected input on the processor, cable path, source output format, and any required conversion settings. The processor identifies the correct input and reports a stable signal with the expected resolution and frame rate. Select the correct input, enable the source output, reseat connectors, and ensure that the input format is supported by the receiving equipment. Check HDMI, DisplayPort, SDI, or other installed signal paths according to the system design. High
5 Inspect Cables, Connectors, and Signal Distribution Random blackouts, sparkles, color loss, image noise, or problems affecting only part of the wall. Test each cable, connector, extender, distribution point, receiving card link, and power connection in sequence. The signal remains stable when cables are moved slightly, and all wall sections receive the same data. Reseat or replace damaged cables, secure connectors, reduce unnecessary cable length, and isolate the failed section by testing one link at a time. Longer high-bandwidth cable runs are more sensitive to signal loss and electromagnetic interference. High
6 Check Cabinet Mapping and Data Routing Cabinets show the wrong content, display in the wrong order, or contain repeated, missing, or reversed images. Compare the physical cabinet layout with the configured receiving-card order, scan direction, cabinet size, and data chain. Every cabinet displays the correct portion of the image in the correct physical position. Correct the cabinet map, data-chain order, receiving-card parameters, and scan configuration. Save a backup before changing settings. Mapping errors usually affect specific cabinets or sections rather than the entire wall. Medium
7 Check Brightness, Color, and Calibration Settings Uneven brightness, color differences, gray lines, dark modules, or an image that looks excessively dim or bright. Compare brightness limits, gamma, color temperature, calibration data, module connections, and power conditions. The wall has consistent brightness and color across cabinets, with no visible abnormal modules or lines. Restore the correct calibration file, match brightness settings, inspect module and power connections, and replace failed components only after isolating the fault. Brightness changes can alter perceived color; calibration should be checked before replacing LED modules. Medium

Inspect LED Modules, Receiving Cards, Pixels, and Image Uniformity

LED video walls rarely fail in one dramatic moment. Troubleshooting usually begins with seven practical checks: inspect LED modules, reseat power and data connectors, test receiving cards, verify cabinet mapping, isolate dead pixels, review calibration, and compare image uniformity. A dark module may indicate a loose connector, not a failed panel. A receiving card can also show correct power while losing signal data. Check cabinet addresses and refresh settings before replacing hardware.

The U.S. Department of Energy reports that quality LED products can maintain about 70% of initial light output after 50,000 hours, but operating temperature and power conditions affect performance. Therefore, inspect ventilation, cabinet temperature, and power distribution. Use a test pattern with white, red, green, blue, and gray fields. Gray fields reveal uneven brightness more clearly. For pixel faults, record their exact positions. Scattered points suggest module damage; repeating blocks may indicate mapping or card problems. I still allow for human error here. A rushed visual inspection misses small color shifts.

Tips: Photograph every fault before opening a cabinet. Swap one suspect module with a verified module, then observe whether the fault moves. Use a calibrated camera when checking uniformity, because human vision adapts quickly. The International Commission on Illumination recommends controlled viewing conditions for reliable color assessment. Avoid judging a wall under changing daylight. Recheck after warming the display for at least thirty minutes. A cold panel can look deceptively uneven. Calibration may improve consistency, but it cannot repair damaged pixels or unstable signal paths.

Apply Safe Repairs and Confirm Stable Performance After Troubleshooting

LED video walls can show flickering tiles, dark pixels, uneven color, or sudden signal loss. Effective troubleshooting starts with evidence, not guesses. Check controller logs, cable seating, module temperature, power readings, and recent maintenance records. A loose data cable can imitate a failed receiving card.

Safe repairs matter more than speed. Shut down the display and isolate the relevant power circuit before opening any cabinet. Use insulated tools and follow the equipment service manual. Never work inside energized equipment. Replace damaged cables, connectors, or modules with correctly rated parts. A qualified technician should inspect grounding, power distribution, and internal connections. I have seen rushed repairs create new faults. That mistake is easy to repeat.

Tips: Photograph cable positions before removal. Mark each connection clearly. Keep replacement parts dry and dust-free. Avoid touching LED surfaces with bare hands. After every repair, inspect the cabinet seals and ventilation paths.

Stable performance needs a controlled test. Restore power gradually, then check the full wall at low and normal brightness. Display white, black, red, green, and blue test screens. Watch for color shifts, flicker, delayed tiles, and unusual fan noise. Run content continuously for at least thirty minutes. Measure temperature near previously affected areas. Record brightness, signal status, and power behavior. If the wall passes once but fails after warming, the repair is not fully confirmed. I sometimes overlook this thermal change, so a longer observation period is worth the extra effort.

7 Best Ways to Troubleshoot LED Video Walls

The chart shows the number of practical verification actions included in each troubleshooting method. Complete every check before applying a repair and confirm stable operation afterward.

Prioritize power and signal checks first, then inspect modules, configuration, cooling, and long-duration stability. Always isolate power before opening cabinets or replacing components.

FAQS

What should I check when an LED module appears dark?

Reseat its power and data connectors first. A loose connection can resemble a failed module. Photograph the fault before opening the cabinet. Swap the suspect module with a verified one. If the darkness moves, the module is likely responsible.

How can I investigate flickering or sudden signal loss?

Check cable seating, controller logs, receiving cards, and recent maintenance records. A receiving card may have power but no signal data. Verify cabinet addresses and refresh settings. I sometimes blame hardware too quickly. Evidence should guide the repair.

What test pattern helps reveal image problems?

Display white, black, red, green, blue, and gray fields. Gray screens expose uneven brightness more clearly. Watch for delayed tiles, color shifts, and flicker. Small differences are easy to miss. Human vision adapts surprisingly fast.

How should I identify pixel faults?

Record each faulty pixel’s exact position. Scattered points may suggest module damage. Repeating blocks can indicate mapping or receiving-card problems. Use clear photographs for comparison. Do not assume every dark pixel has the same cause.

When should calibration be used?

Calibration can improve brightness and color consistency. It cannot repair damaged pixels or unstable signal paths. Recheck the wall after warming it for thirty minutes. A cold panel may look uneven. That detail is easy to overlook.

How can I check image uniformity accurately?

Use a calibrated camera under controlled viewing conditions. Avoid judging the wall during changing daylight. Measure white and gray fields across the entire display. Compare affected areas with nearby cabinets. My visual judgment is not always reliable.

What safety steps are required before opening a cabinet?

Shut down the display and isolate the relevant power circuit. Use insulated tools and follow the service manual. Never work inside energized equipment. A qualified technician should inspect grounding and power distribution. Speed is not worth a new fault.

How do I confirm that a repair is stable?

Restore power gradually and test low and normal brightness. Run white, black, red, green, and blue screens for at least thirty minutes. Check temperature near the repaired area. Listen for unusual fan noise. If failure returns after warming, the repair is not confirmed.

Conclusion

Learning how to troubleshoot LED video walls starts with identifying the exact problem and observing visible symptoms such as black areas, flickering, color distortion, uneven brightness, or missing images. Begin by checking power delivery, cables, connectors, controllers, and signal paths to ensure every component is securely connected and receiving stable power. Then test the content source, input settings, resolution, and refresh rate, since mismatched configurations can create image errors or unstable playback.

If the issue continues, inspect LED modules, receiving cards, pixels, and overall image uniformity to determine whether a specific hardware section requires attention. Any repair should be performed safely by qualified personnel, with power isolated when necessary and damaged parts replaced correctly. After troubleshooting, run the video wall for an extended period, display different content, and confirm that brightness, color, synchronization, and playback remain stable. A methodical process helps restore reliable performance and reduces the chance of repeated faults.

Henry

Henry

Henry is a dedicated marketing professional with a profound expertise in the company's offerings. With years of experience in the industry, he possesses an impressive understanding of the market dynamics and consumer behaviors that drive success. Henry is committed to sharing his insights through......